One of my recent discoveries in the kitchen has been cast iron. I have found that cast iron is probably the longest lasting and most efficient types of pans to cook with. Cleaning cast iron can be tricky, as you can't just throw it into the dishwasher or let it soak in the sick since it will easily rust.
Showing posts with label sink. Show all posts
Friday, January 27, 2017
Quick Tip: Cleaning Cast Iron and More
Friday, October 28, 2016
How to Organize Kitchen Cupboards
If you want to get some more great ideas with organizing your kitchen, I've got them! Last week I shared my new kitchen and how I organized all the drawers in there! Today I'm sharing the rest of the cupboards in the kitchen! There's so many great ideas I'm going to give you about organizing them, so be sure to share this and pin all your favorites!
Tuesday, October 25, 2016
Where to Get Those Kitchen Products and Appliances
With all that has gone on in the past months with our kitchen, I wanted to share some of the amazing products that I used and recommend for you to use also, should you decide to re-do a kitchen, update a bath, or just pin a few of your favorites.
I work with a lot of great companies and I was able to reach out to a few of them that I have worked with in the past to provide me with a few things for my kitchen. Other things are just fun finds that I found on my own and want to share my opinion about how it works and whether or not it was worth the money to purchase that products. So, I'm going to go through everything and hopefully answer all your questions about them.
Friday, October 21, 2016
The New Kitchen: Organizing the Drawers
This new kitchen is truly AMAZING! Having someone take what was in my head and design it on paper, then to have it actually in my home, is just an amazing feeling! I can't wait to show you all the organization that I've done in the new kitchen, so today I'm going to share all the organizing in the drawers! There is so much organizing that it's going to take multiple posts to share it all - there is just THAT much awesomeness! Are you ready to PIN some great organizing ideas?
To begin with, my dream was to have as many drawers as possible in the new kitchen. I wish I could have had many more than I have - I would have liked two big drawers under my cooktop but I had to sacrifice those drawers in order to have the downdraft exhaust fan - since that exhaust fan takes up a big chunk of space under the cooktop, so no room for drawers. I also would have loved it under the sink, but being that I wanted to have actual plumbing it's nearly impossible to have drawers there, also! I have drawers all over the place, though! In my opinion, drawers are much better for organizing things than a big, open space. So, I'm going to start with my coffee/wine bar drawers in the dining area of the kitchen, because I just want to start over there and bring you around the kitchen.
Friday, October 14, 2016
The Kitchen is Done - the BIG Reveal!!!!
I have been given the opportunity, from MasterBrand Cabinets,
to join with them in our kitchen renovation, which includes the donations of
these unbelievable, quality cabinets.
I can't believe it, but the kitchen is DONE!! It is unbelievably beautiful. We've increased our counter space by three fold! It's truly the most functional kitchen I've ever had! Are you ready to see it? I hope so, because I'm going to flood you with beautiful photos!
Let me start with where our kitchen began, and you can go back to the beginning of our design process and demo process to see. We moved into our home in 2006, and this is what our kitchen looked like ten years ago, above left. Six years later, I have improved it as much as it could possibly be improved by painting the cabinets and putting new flooring in. But, it still lacked counter space, so I was using a hodge podge of things to add more counter space. The kitchen also felt very cramped! And now...
Tuesday, September 13, 2016
3 Tips to Get Kids to Do the Dishes
This post contains sponsored links from Full Circle.
All opinions are my own and the tips are yours to keep!
Is it me or are dishes one of those things that you just either love to do or hate? Sometimes it's pretty much hate! But, my kids have to do their share of dishes! How do I get them to do it? Well, I've got three tips that help kids get the dishes done - hopefully, without complaint!
Friday, June 26, 2015
11 Ways to Organize with Towel Rods
If you haven't figured it out by now, I LOVE getting creative and finding cheap ways to organize! So, today I've found 11 ways to organized with something probably everyone has in their house - towel rods! Check these amazingly inexpensive and simple ways you can use them to organize - be sure to pin this so you don't forget too!
Monday, October 21, 2013
31 Days of Spontaneous Organizing - Day #21: Under your kitchen sink
Labels:
31 days of Spontaneous Organizing,
kitchen,
sink
Wednesday, October 16, 2013
31 Days of Spontaneous Organizing - Day #16: Under bathroom sink
Labels:
31 days of Spontaneous Organizing,
bathroom,
sink
Wednesday, September 18, 2013
Monday, June 3, 2013
Monday, April 22, 2013
Wednesday, April 25, 2012
Organizing with Brittany, the Pretty Handy Girl
I'd like to take the time to let you all know that I'm away on a business trip with my hubby in Florida for the next week - and last week my Mom was in the hospital a few hours away and I have been by her side. That along with many other things going on around the OMF household have made it quite busy for me and my family.
I asked some of my dear blog friends to help me out and fill in for me all this week...so you are going to see some amazing ladies who have amazing spaces. I would LOVE it if you went over to visit their blogs and let them know I sent you - and pin some of their fabulous tutorials while you're over there.
First up is my friend, Brittany from Pretty Handy Girl. She won't disappoint...she has skills like I could only dream of. I consider myself fairly handy, but not nearly as handy as Brittany. She's a DIY go-to girl and has a blog filled with ways to empower women to pick up those tools and learn to fix things.
I'm so excited to be joining Becky today at Organizing Made Fun. Becky and I finally got the chance to meet in person at Blissdom.
Normally I don't look this clean. I usually have sawdust in my hair or paint splatter on my elbows. I write a blog full of tutorials for everything from crafting and sewing:
to building and home repairs:
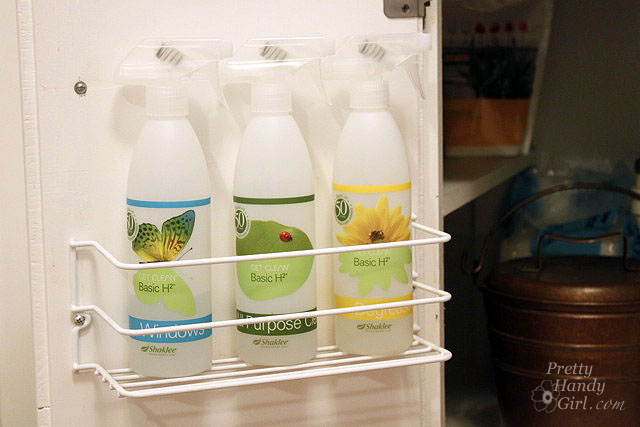
But, there were three things that I reach for over and over again throughout the day: My cleaning spray bottles. I wanted them close at hand and easy to reach as I fought sticky counter syndrome (you moms of young kids know what I'm talking about, right!) I purchased a wire shelf that mounts to the inside of the cabinet door and installed it in a matter of minutes!
Step 3. Drive one screw into one side. Leave part of the screw protruding from the cabinet.
Step 4. Insert the wire shelf underneath the first screw. Use the drill to drive the second screw into the opposite side. Tighten or loosen the screws as necessary.
See, I told you she was amazing! If you want to follow my adventures in Florida, you can follow me on my Instagram or Twitter...where I'll be sharing my photos from my travels abroad!
I asked some of my dear blog friends to help me out and fill in for me all this week...so you are going to see some amazing ladies who have amazing spaces. I would LOVE it if you went over to visit their blogs and let them know I sent you - and pin some of their fabulous tutorials while you're over there.
First up is my friend, Brittany from Pretty Handy Girl. She won't disappoint...she has skills like I could only dream of. I consider myself fairly handy, but not nearly as handy as Brittany. She's a DIY go-to girl and has a blog filled with ways to empower women to pick up those tools and learn to fix things.

I'm so excited to be joining Becky today at Organizing Made Fun. Becky and I finally got the chance to meet in person at Blissdom.
Right away I felt as if I was hanging out with a close friend that I'd known for years. I love when that kind of connection happens.
I have an easy tutorial for you today on better organization under the kitchen sink. But, before we get to the tutorial, I think introductions are in order.
Hi, my name is Brittany (aka Pretty Handy Girl).
Normally I don't look this clean. I usually have sawdust in my hair or paint splatter on my elbows. I write a blog full of tutorials for everything from crafting and sewing:
to building and home repairs:
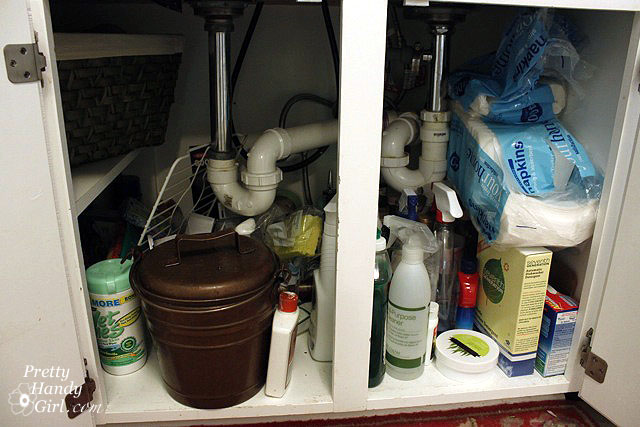
Today I want to share with you some tips to maximizing space under your kitchen sink. If you are like me, you might have stuff crammed under there that could be labelled as potential explosive material (because every time I open those doors I prepare myself for random cleaners and bottles to explode out after being shoved in.)
Finding anything in there required moving everything. After one too many frustrating episodes of not being able to find a clean sponge or dish detergent, I decided enough was enough! As a busy blogger and mother of two I don't have time to try to find a clean sponge in my own cabinet!
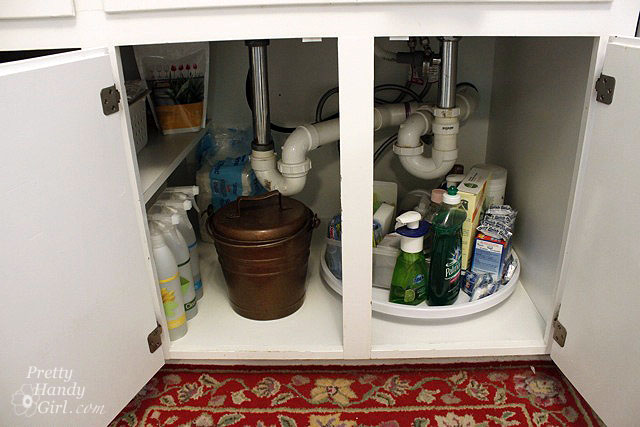
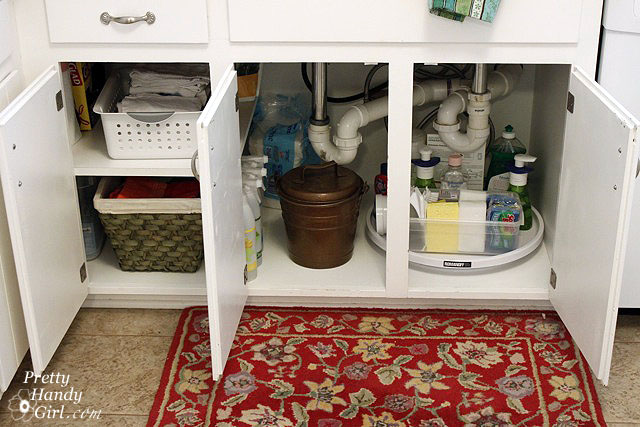
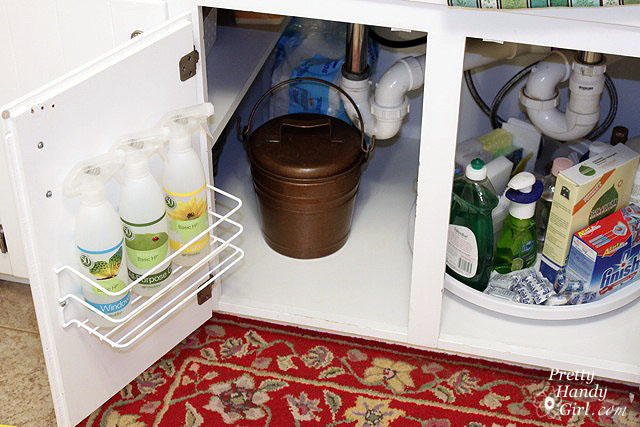
First I cleared everything out of the cabinet and donated all the products that I don't use. I purchased a plastic lazy susan and put it under one side of the sink.
All the frequently used products live on "Susan". I had to play with the placement of some of the taller bottles so they wouldn't hit the drain as they spun around.
On the left side, I store the larger items (compost bucket, napkins and paper towels.)
I also found two baskets to hold dish rags and kitchen towels.
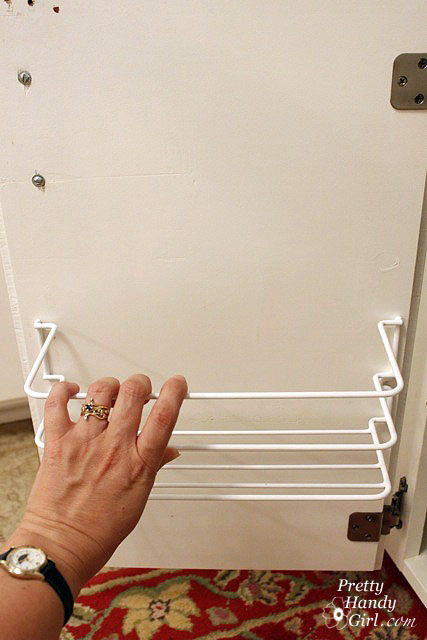
But, there were three things that I reach for over and over again throughout the day: My cleaning spray bottles. I wanted them close at hand and easy to reach as I fought sticky counter syndrome (you moms of young kids know what I'm talking about, right!) I purchased a wire shelf that mounts to the inside of the cabinet door and installed it in a matter of minutes!
Here's the tutorial to add your own sticky counter arsenal holder:
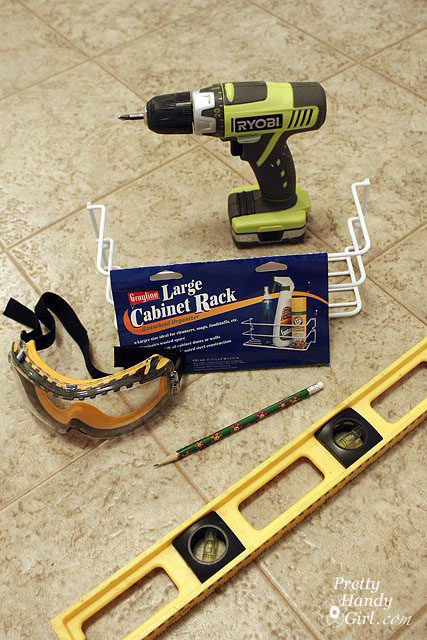
Materials:
- Cordless drill (or philips screwdriver)
- Cabinet rack
- Safety goggles
- Pencil
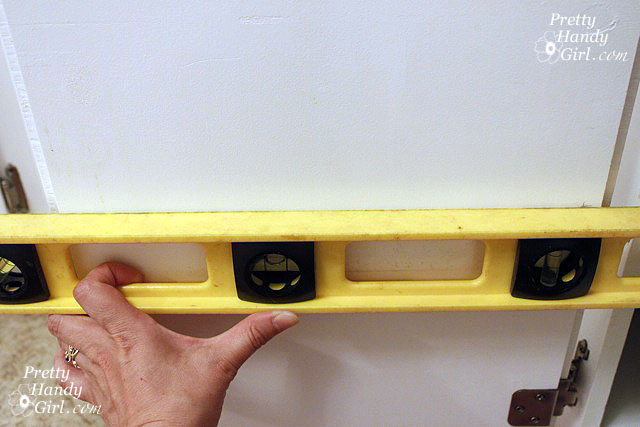
- Level
Difficulty: Easy - limited power tool usage. A screwdriver could be used instead of a drill.
Instructions:
1. Hold the wire shelf against the cabinet door to determine the height you want to mount it. Mark the location of one of the screw holes on the side of the rack.
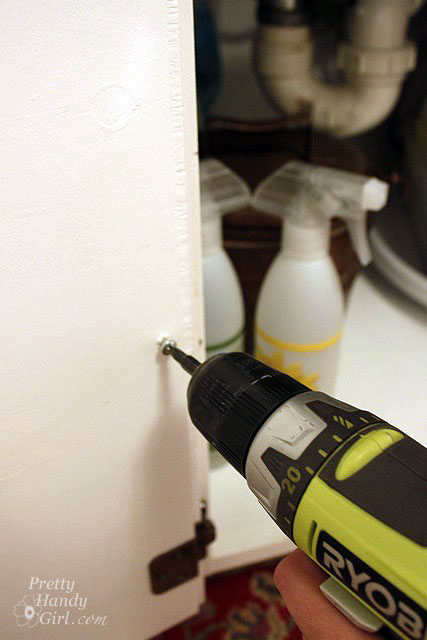
Step 3. Drive one screw into one side. Leave part of the screw protruding from the cabinet.
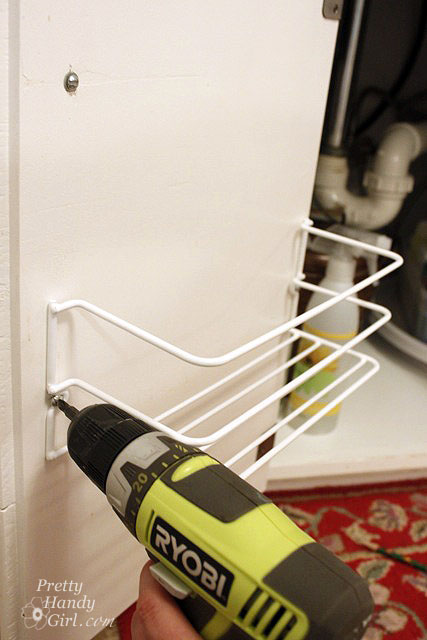
Step 4. Insert the wire shelf underneath the first screw. Use the drill to drive the second screw into the opposite side. Tighten or loosen the screws as necessary.
Step 5. Store cleaners or other products on the shelf.
Can I get a wooohooo for being organized and utilizing unused space on the cabinet door?! Thanks for having me today. I hope you'll come visit me soon at PrettyHandyGirl.com.

See, I told you she was amazing! If you want to follow my adventures in Florida, you can follow me on my Instagram or Twitter...where I'll be sharing my photos from my travels abroad!
Like what you see here? Consider becoming a follower or subscribe via email!
Having trouble seeing the pictures? Try THIS.
Are you an Organized Reader? I'd love to see your organized space. Email me HERE and show me your space to possibly be featured as one of my Organized Readers.
Wednesday, March 2, 2011
How I organize my kitchen...under my sink
If you've ever tried to tackle organizing, it's best to do it one little bit at a time! That's what I do...and what I always recommend to ladies who come to me asking for advice to getting their whole house organized. Start small and then keep that newly organized place up a little bit each day. You'll find that sometimes your space isn't working how you wanted it to, but that's alright. Here's what I did when I could see there was a problem under my sink.
| Just lovely, isn't it? |
Labels:
kitchen,
organize,
sink,
the container store
Friday, August 13, 2010
It's the little things...small project!
Subscribe to:
Posts (Atom)