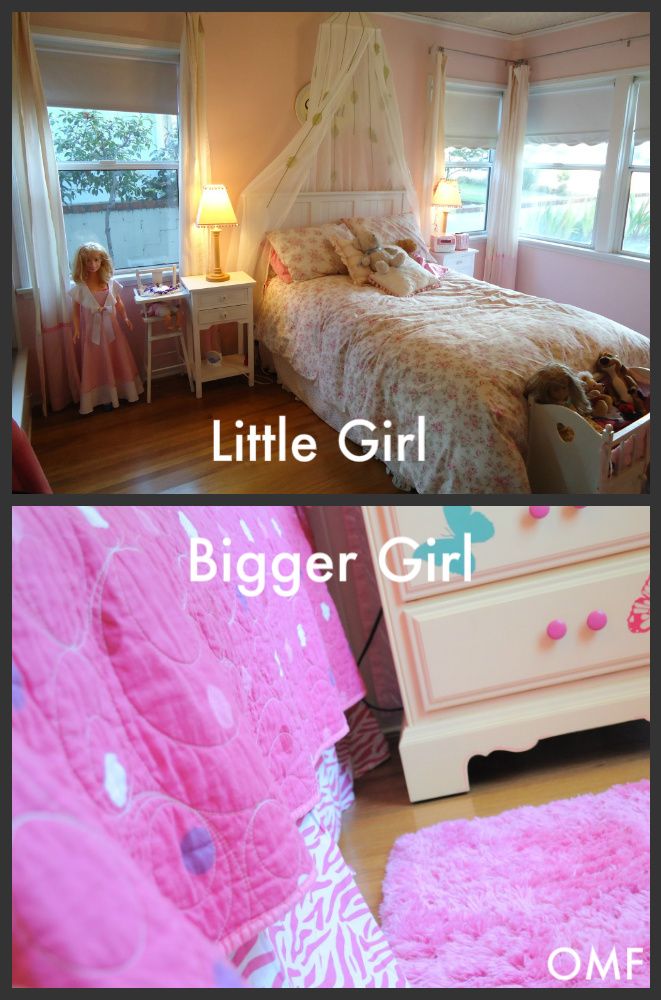
It has been several months since we redesigned my teenaged daughter's bedroom for her birthday, but I wanted to share how lovely it turned out. It's difficult to get into her room and photograph these days, as she is now homeschooled and spends an enormous amount of time in her room, and more specifically on her bed! If you've been following me for any time now, you may remember that we re-did her bedroom a few years ago! She is now a full fledge teenager and has very specific design ideas and so for her 14th birthday, I told her we could redecorate her room. It has been FIVE years and she's a lot different at 14 then she was at 9 years old! Here is what her room looked like before:
Showing posts with label spray paint. Show all posts
Saturday, May 5, 2018
Teenaged Girl's Bedroom in Scandinavian Design
Labels:
bedroom,
birthday,
closet,
clothing,
clutter,
desk,
drawers,
furniture,
IKEA,
Kids,
organize,
paint,
room,
Small space,
spray paint,
the container store
Thursday, September 28, 2017
Outdoor Bar Cart Makeover
It mustn't be just me, because I see the bar cart is getting to be quite popular lately - like they were 40 or 50 years ago! I really wanted to find a bar cart, but wanted a vintage one that I could update and make over. We hunted all over the place, looking in thrift store after consignment store after antique store looking for something that would work. I found all kinds of bar carts - metal, plastic, big, small, short, tall. But, I had one in my mind and couldn't get that one out of my head!
Friday, August 25, 2017
Updated Master Bedroom Wallpaper
I was given products from Sherwin-Williams and Walls Republic to complete this project!
It's the season of projects for me now, at least I've got that drive to get lots done right now. I doubt I'll ever be done with projects around my house and something will always need updating, but I just love doing new things and having projects to do! Our master bedroom hadn't been painted in nearly 8 or 9 years - and that's a long time for me. Add to that, I wanted something to sort of pop in there and make it change. I updated our bedroom a few years ago but wanted something more. It looked nice, but it really needed new paint since the walls had faded a lot.
I decided that I would take my wallpaper obsession to another level and again get some wallpaper up behind the bed. I had previously had a darker blue-ish paint color and wanted to update with gray. I also had put these decals on behind our bed and they were starting to pop off!
Labels:
bedroom,
organize,
paint,
Small space,
spray paint,
wallpaper
Tuesday, November 8, 2016
Boom Shakalaka Entry Goes Stylin!
The kitchen update has been amazing! I am truly thankful and amazed every time I am in there, to know how updated and functional it is! But, my entry, which is right next to the kitchen, was looking a bit shabby! So, I realized I had to kick it up a notch so it could compete with the awesome boom shakalaka-ness of the kitchen!
It started out nice, but it needed a lot more pizzaz. I mean, a lot!
Labels:
entry,
front entry,
paint,
spray paint
Tuesday, May 17, 2016
How to Freshen Up an Outdoor Candle
Summer is just about here and spring has been especially good to us this year - we've had a little bit of rain and lots of amazing weather. Well, living in Southern California, we've usually got good weather, but we also get lots of dirty smog and it can make things outside look awful! I have these lovely plastic, outdoor candles that I like to have on my deck to look pretty. But, they don't look so great! So, I made them pretty again!
Friday, February 26, 2016
Chalkboard Art Made Simple
If you saw my amazing houndstooth wallpapered wall I shared last week, I told you that I was still working on the other wall. Well, it's done! Here is the fireplace wall in our middle {totally awkward} room.
And, now for that wall over those fabulous turquoise chairs:
Labels:
chalkboard,
paint,
room,
spray paint
Friday, February 19, 2016
What Did You Put on Your Walls?
If you live in an old home like I do, or an awkward layout newer home, you might have one of these rooms. Ours used to be our "Piano Room", as we had our piano in there for years and taught piano lessons there, as well. But, it's the "walk through" room, the one with all these doorways and places to go but with no real purpose of anything going on IN the room! It has SEVEN - yes, that's 7 - doorways in this room! There is a fireplace, which of course, no one could ever enjoy since there is no where to sit down and enjoy it! So, that fireplace gets no use at all. We moved the piano into our living room, now that I'm not teaching piano lessons anymore, and I decided it was time to do something drastic and fun in this middle room! Here is a before...
And, here is the layout that I drew up so you could get an idea of what it really looks like, along with a short video I made on my iPhone of the room in person.
Labels:
paint,
room,
Small space,
spray paint
Friday, September 11, 2015
Time for RV Debrassification
Updating our RV is a continuous journey. We bought our used RV about 9 months ago now. Let me interject here and just say we have LOVED the whole experience of RVing. And, we have never had so many little vacations! We travel about every 4-6 weeks to some campground and it has been a big de-stresser for us - especially my husband and I. Most campgrounds have little to no internet or cell capabilities - and that's GOOD! It has caused us to put down the technology and just relaxed and enjoy one another. Now, let me talk about something else I love - organizing and decorating - and in this case, debrassification. Yes, that's my word and I made it up but I bet you know what it means!
And...I'm going to share how I changed the shower doors from brass to oil rubbed bronze!
Labels:
paint,
projects,
RV,
spray paint
Tuesday, August 11, 2015
How to Hide Messy Cords with Pegboard
This post is sponsored by National Hardware,
but opinions about pegboard products are completely mine!
I have this problem area under my desk in my home office with all my cords - they are awful and ugly. It's probably something many of you have a problem with, too! I've been trying to come up with some sort of "pretty" solution to the problem. And I did! Get ready to pin this and share it because there is NOTHING on Pinterest like it - I've looked!
Labels:
Office,
pegboard,
sponsors,
spray paint
Thursday, November 6, 2014
Colorful Home Updates
If you recall, I shared with you our native, drought tolerant front yard landscape six months ago. It was a bit sparse - since it was newly planted. Our drought here in Southern California has only gotten worse, so it has already proven to be a smart decision for us to "go native" and we've seen a ton of growth in our front yard in the last six months! I've also added more color to the front yard and other places around our house I'd like to share with you...
Labels:
backyard,
front entry,
Home Tour,
spray paint,
yard
Friday, February 10, 2012
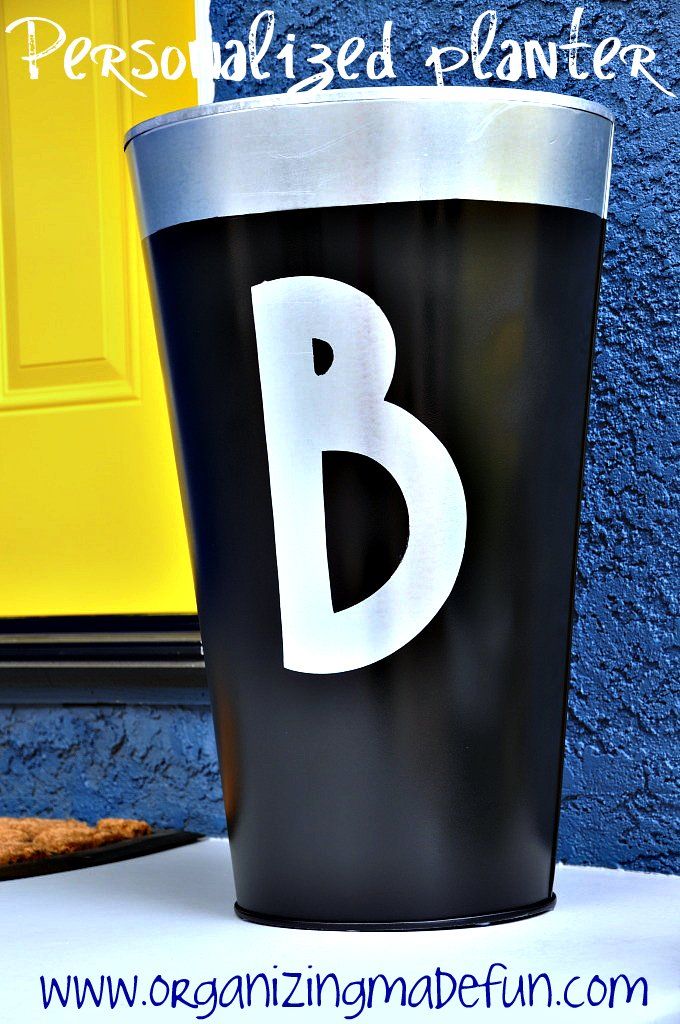
Curb Appeal: Customized planters
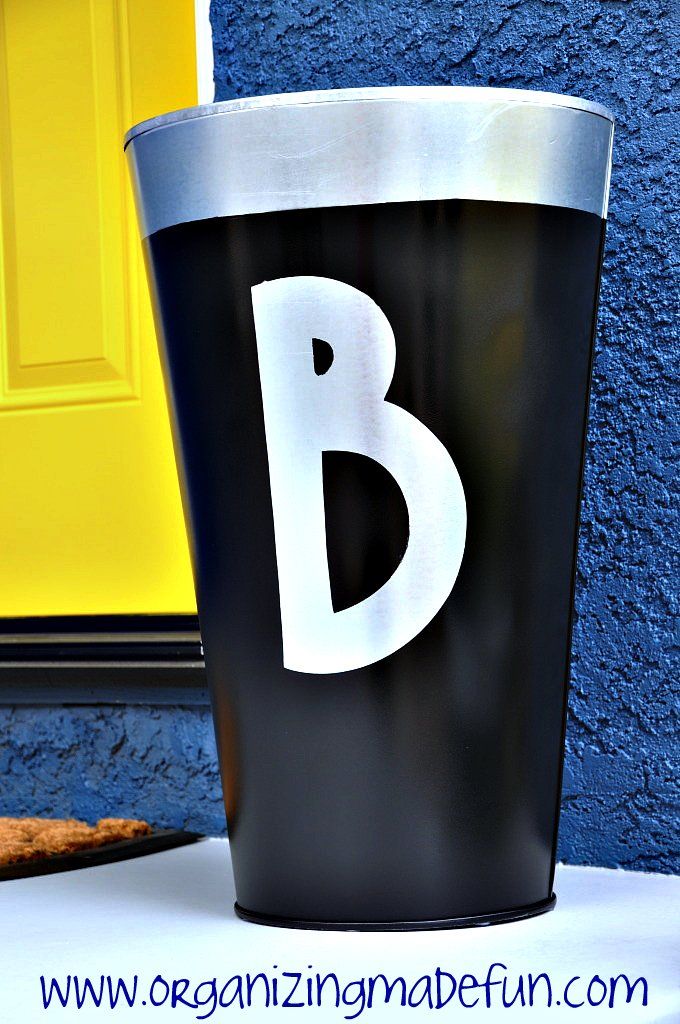
More curb appeal! Our house is now looking so much more personable. So, to add even MORE personality to this fun entry, I decided to make some personalized planters.
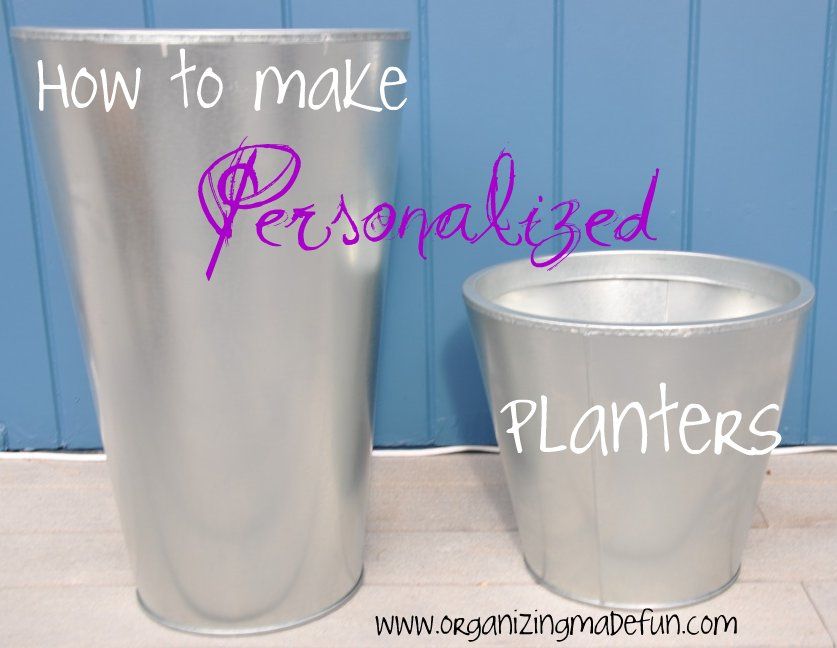
I bought some galvanized planters at Ikea, one tall and one mid-sized planter.
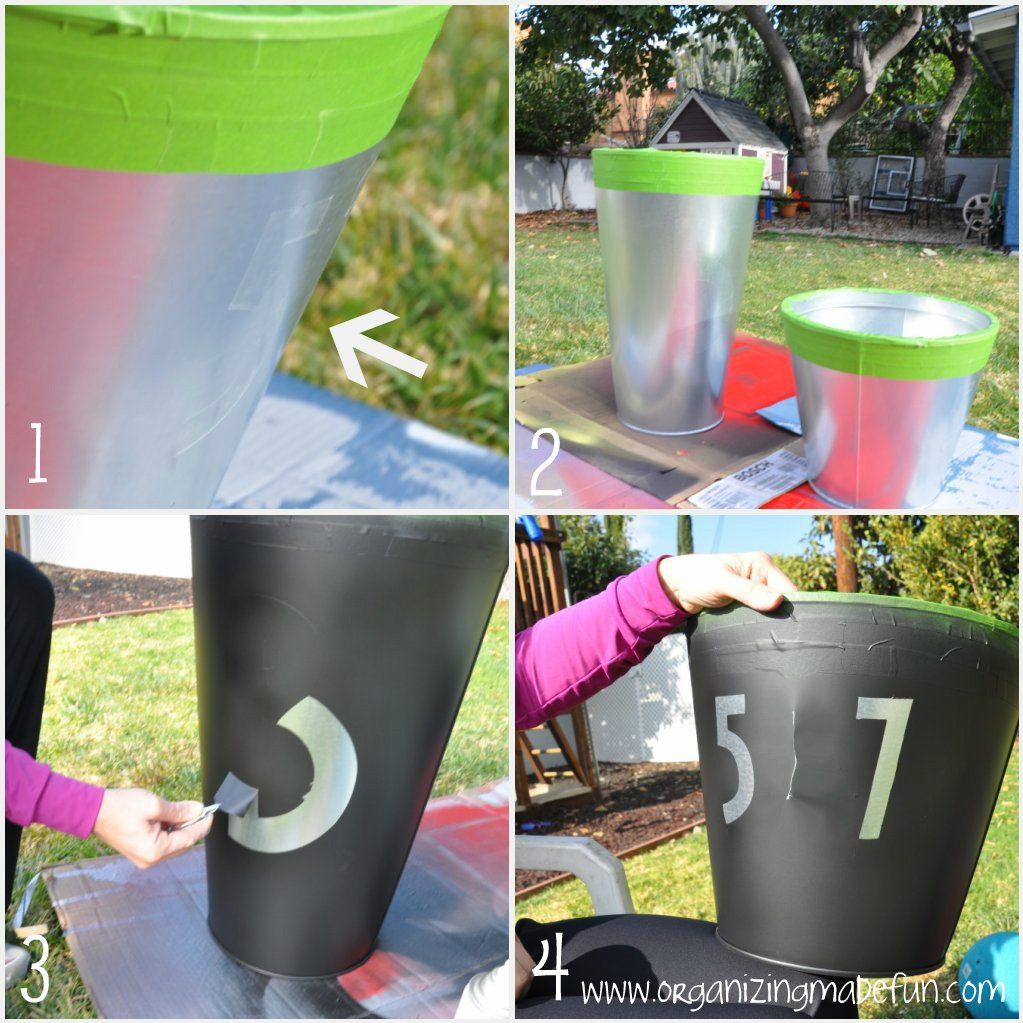
Since I don't have a Cricut or Silhouette machine, I asked my friend Marti if she could help me out. She has a Cricut {which was SO fun to use} and found a great font that I liked in a large size. We used clear contact paper to cut the stencil out. I wanted to have a reverse stencil effect, so this was just right. She also made a set of matching numbers for my house number.
I took some "frog tape" and taped off around the top of the planter - of course, I measured it first. I measured out where to put the letter and numbers on each planter. Then, I spray painted a flat black in light coats. The last coat, I immediately peeled off the cut letter/numbers {I practiced doing this with an extra number on the bottom of one of the planters}. I took a pin to prick the corner and then tweezers to pull it off. {the house numbers are obscure on purpose, by the way}.
You may have noticed that some of the black came off when I was pulling off the stencil, but I just took a black marker and filled in those spots - you can't even tell! Then, I sprayed a glossy clear acrylic over the whole thing - to seal it all in and give it a nice shine.
Now, I just have to actually put some plants in them! Soon!
Parties:
Tater Tots and Jello
Funky Junk Interiors
Iheart Naptime
Positively Splendid
DIY Showoff
Home Stories from A to Z
Tip Junkie
A Bowl Full of Lemons
36th Avenue
The Shabby Nest
Thrifty Decor Before and After
I bought some galvanized planters at Ikea, one tall and one mid-sized planter.
Since I don't have a Cricut or Silhouette machine, I asked my friend Marti if she could help me out. She has a Cricut {which was SO fun to use} and found a great font that I liked in a large size. We used clear contact paper to cut the stencil out. I wanted to have a reverse stencil effect, so this was just right. She also made a set of matching numbers for my house number.
I took some "frog tape" and taped off around the top of the planter - of course, I measured it first. I measured out where to put the letter and numbers on each planter. Then, I spray painted a flat black in light coats. The last coat, I immediately peeled off the cut letter/numbers {I practiced doing this with an extra number on the bottom of one of the planters}. I took a pin to prick the corner and then tweezers to pull it off. {the house numbers are obscure on purpose, by the way}.
You may have noticed that some of the black came off when I was pulling off the stencil, but I just took a black marker and filled in those spots - you can't even tell! Then, I sprayed a glossy clear acrylic over the whole thing - to seal it all in and give it a nice shine.
Now, I just have to actually put some plants in them! Soon!
Like what you see here? Consider becoming a follower or subscribe via email!
Having trouble seeing the pictures? Try THIS.
Are you an Organized Reader? I'd love to see your organized space. Email me HERE and show me your space to possibly be featured as one of my Organized Readers.
Parties:
Tater Tots and Jello
Funky Junk Interiors
Iheart Naptime
Positively Splendid
DIY Showoff
Home Stories from A to Z
Tip Junkie
A Bowl Full of Lemons
36th Avenue
The Shabby Nest
Thrifty Decor Before and After
Friday, November 18, 2011
Special doors for the playhouse
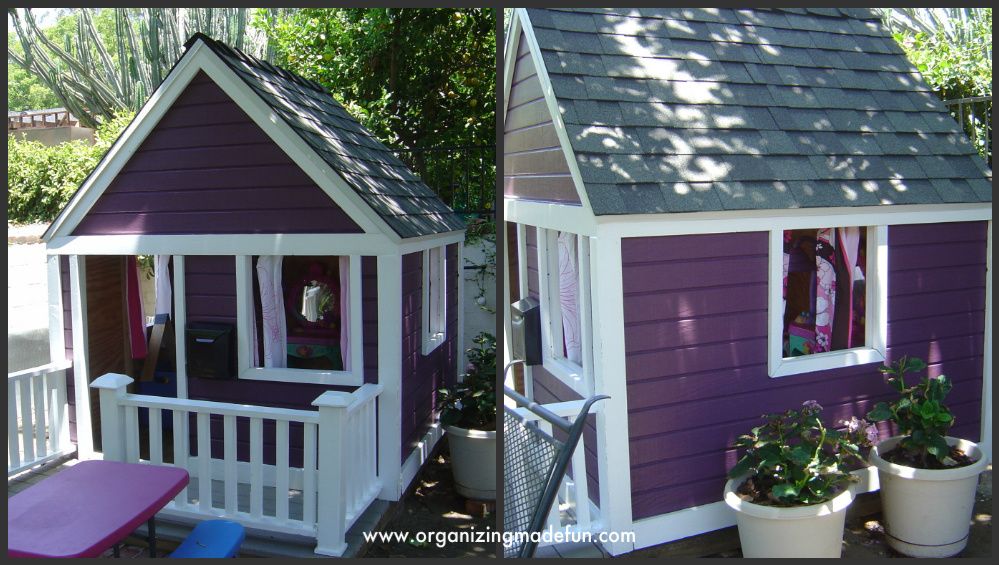
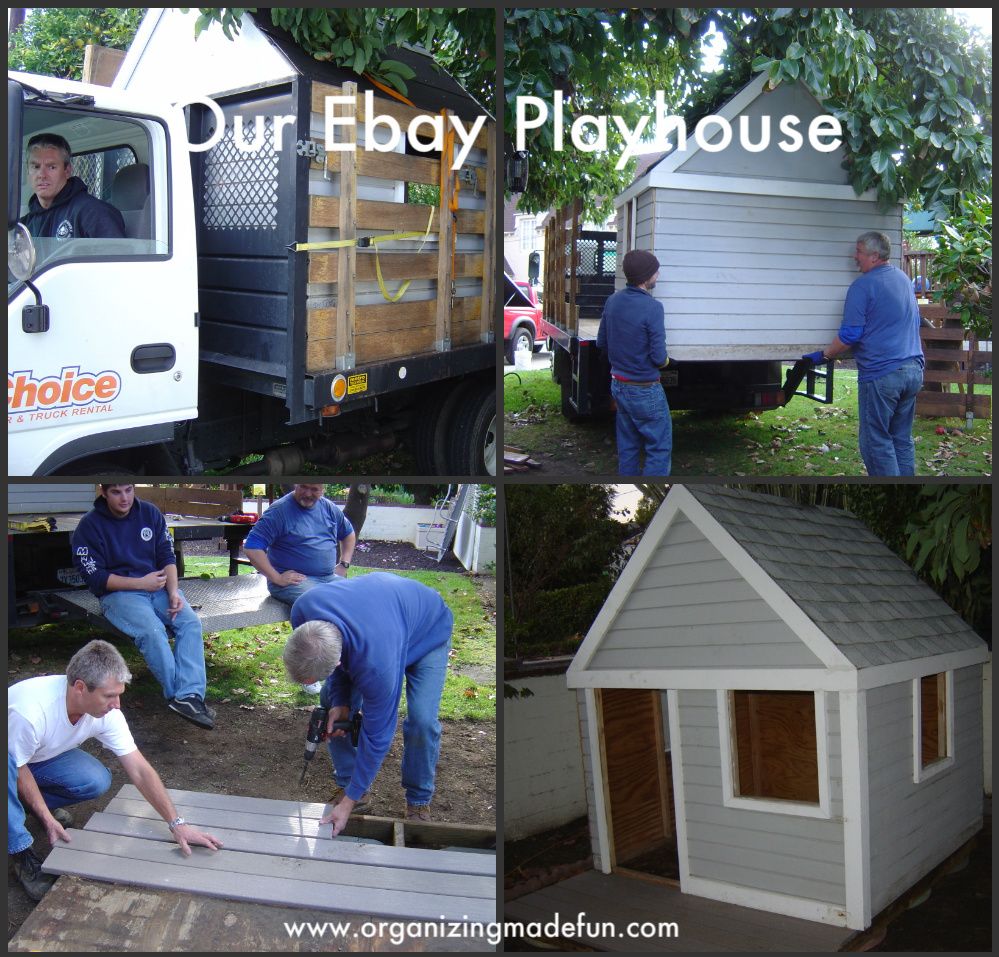
My daughter has this darling playhouse that we got on Ebay several years ago. And we've just improved it some more recently!
You see, it started out looking like this:
My sweet hubby has a soft spot for his little girl, as most Daddys do! He saw her playing in a playhouse at someone's house one day and decided he wanted to build one. That led him to realize his lack of time and cost. He found this one, above, on Ebay and it was already built and was cheaper than the materials would've cost him to build a new one!
It got a nice coat of paint, a mis-tint on the end of the paint aisle at Home Depot for $5! Purple is really fun, too!
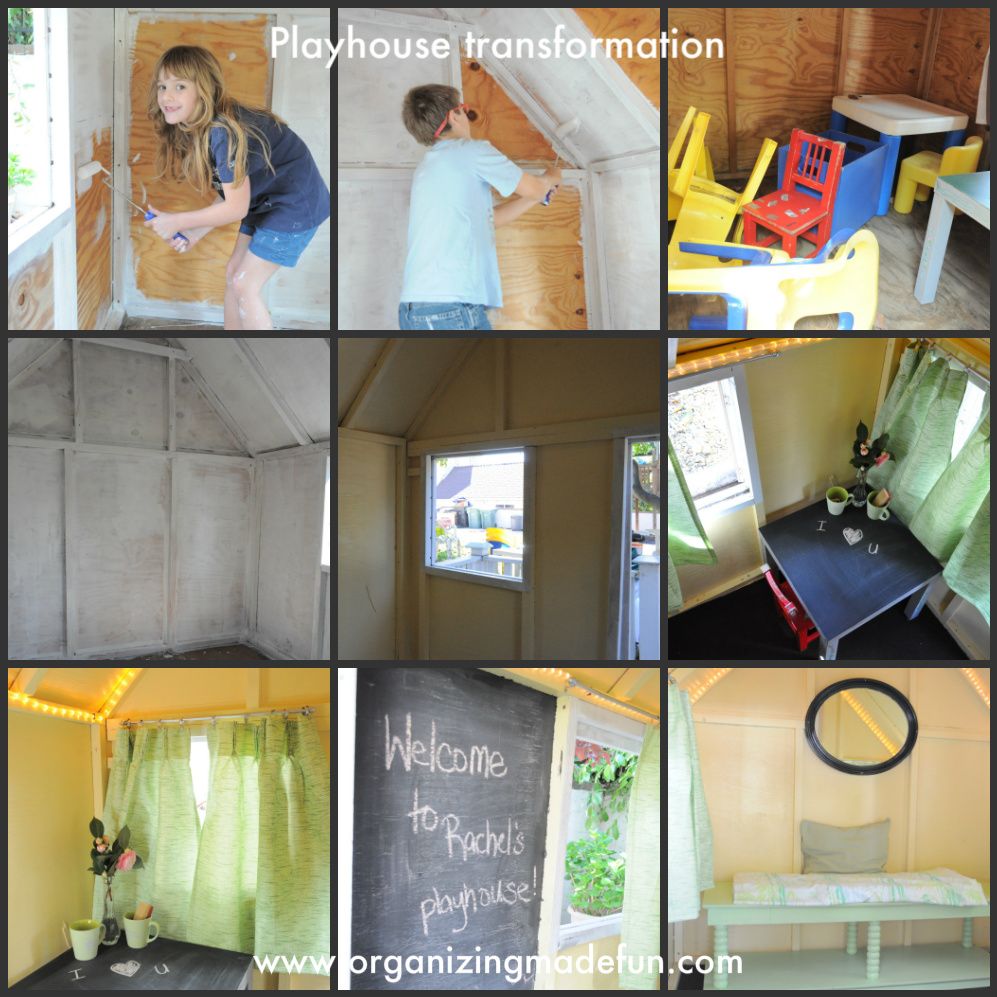
Then, last spring break, the kids re-finished the inside of it mostly themselves.
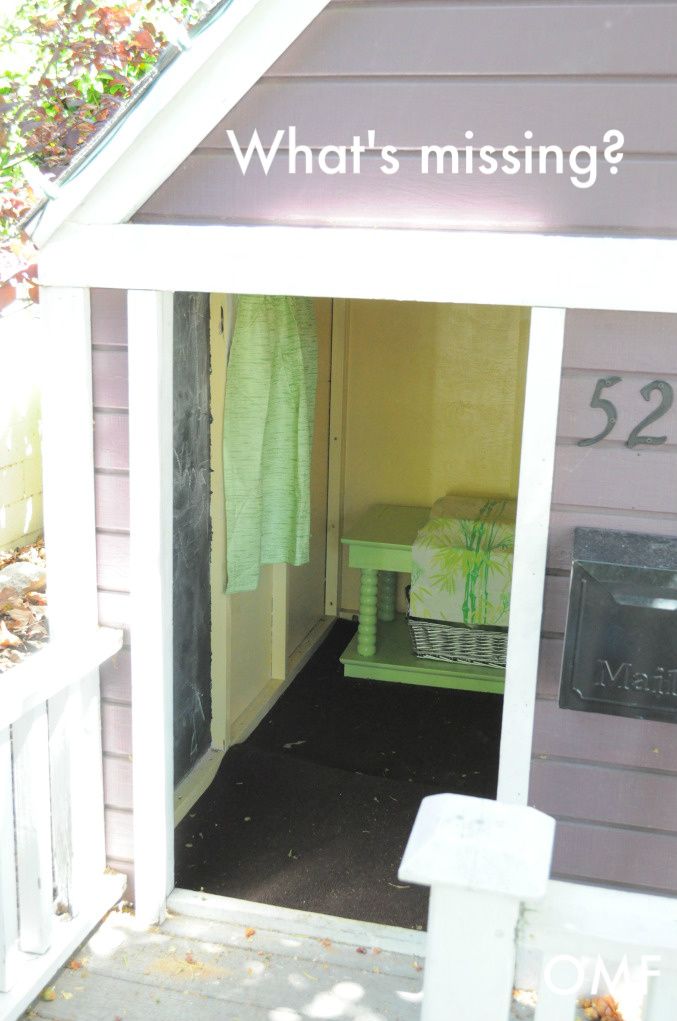
But, there was something missing...doors!
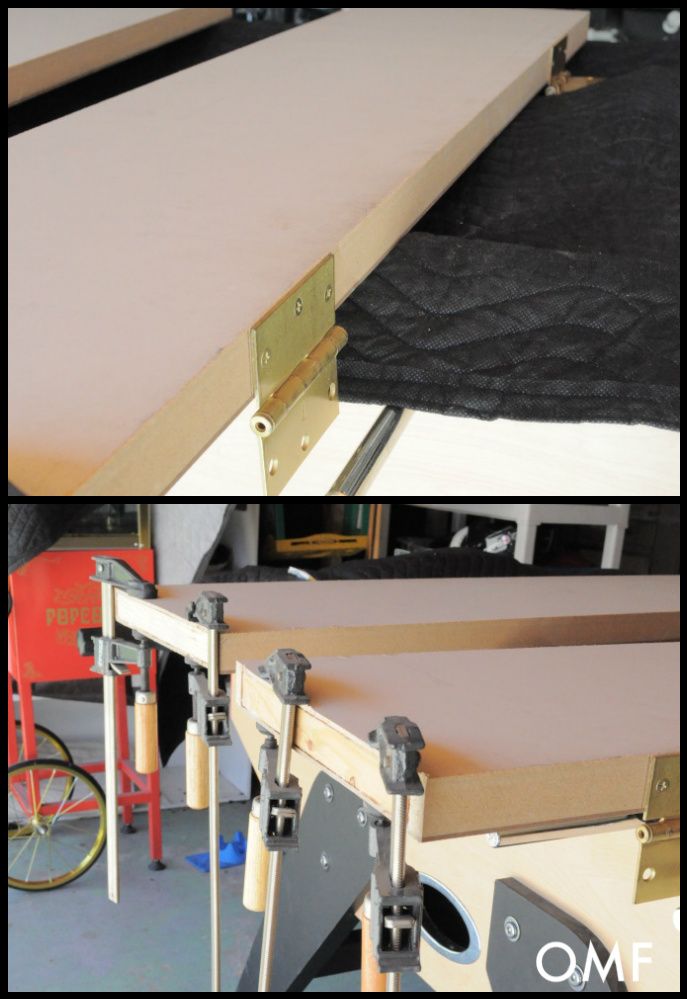
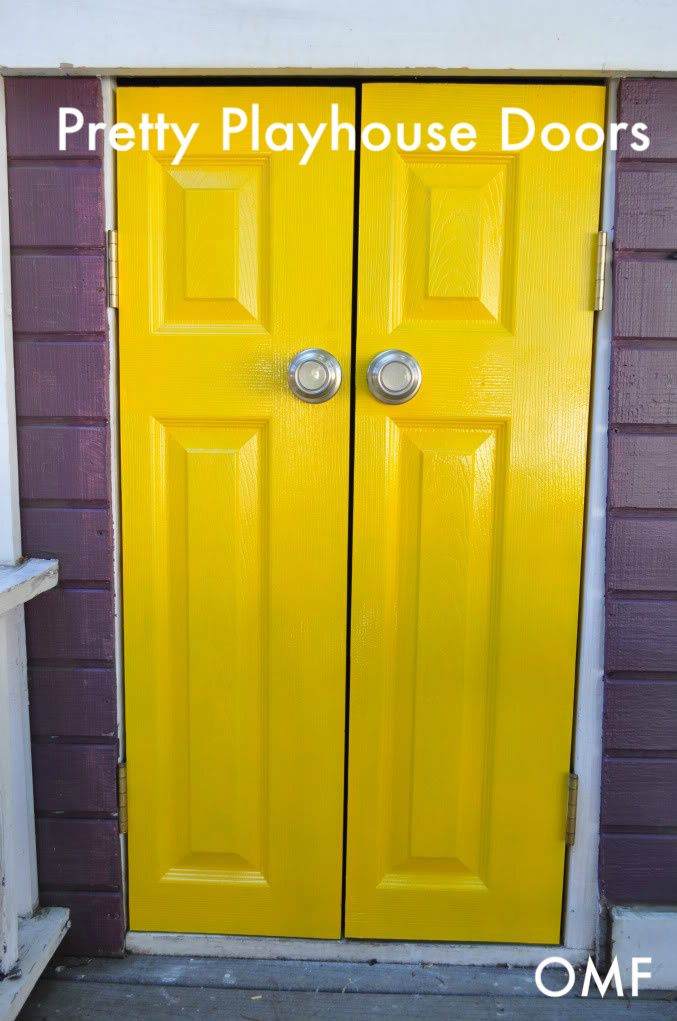
I had some bi-fold closet doors I picked up at The Habitat for Humanity ReStore for $10. I asked my hubby to do something with those, if possible.
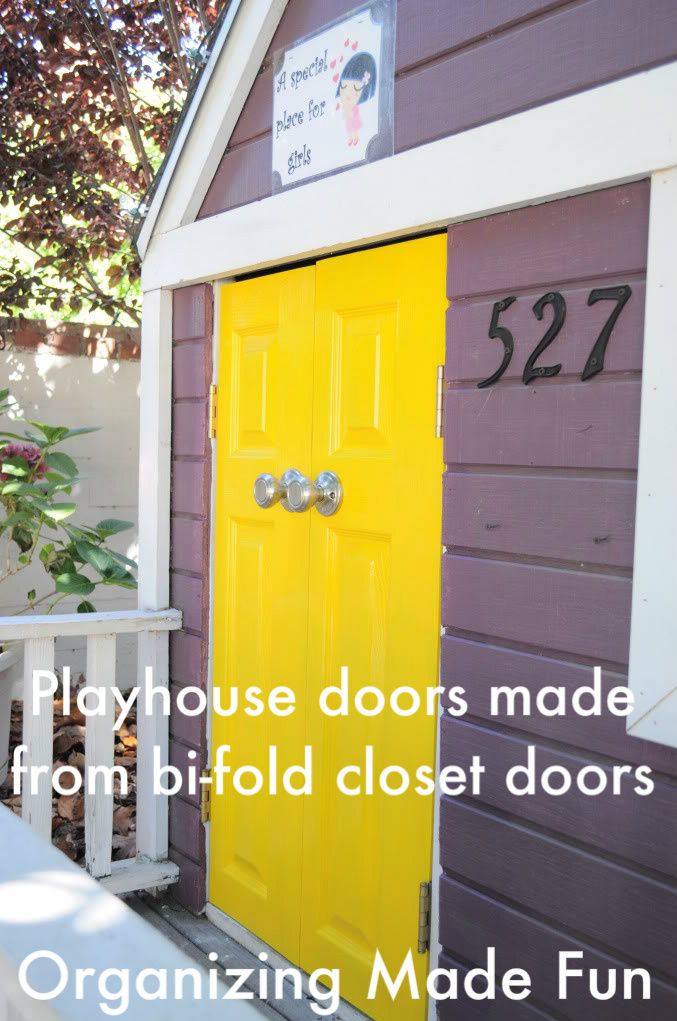
And with some head scratching, he managed to turn them into darling doors for the playhouse by cutting them down.
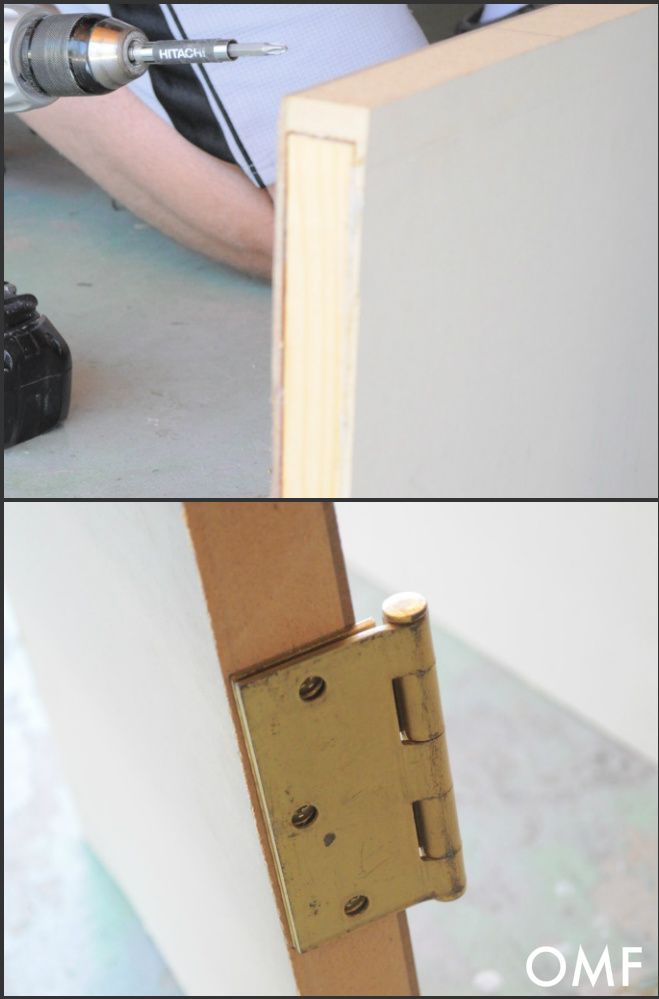
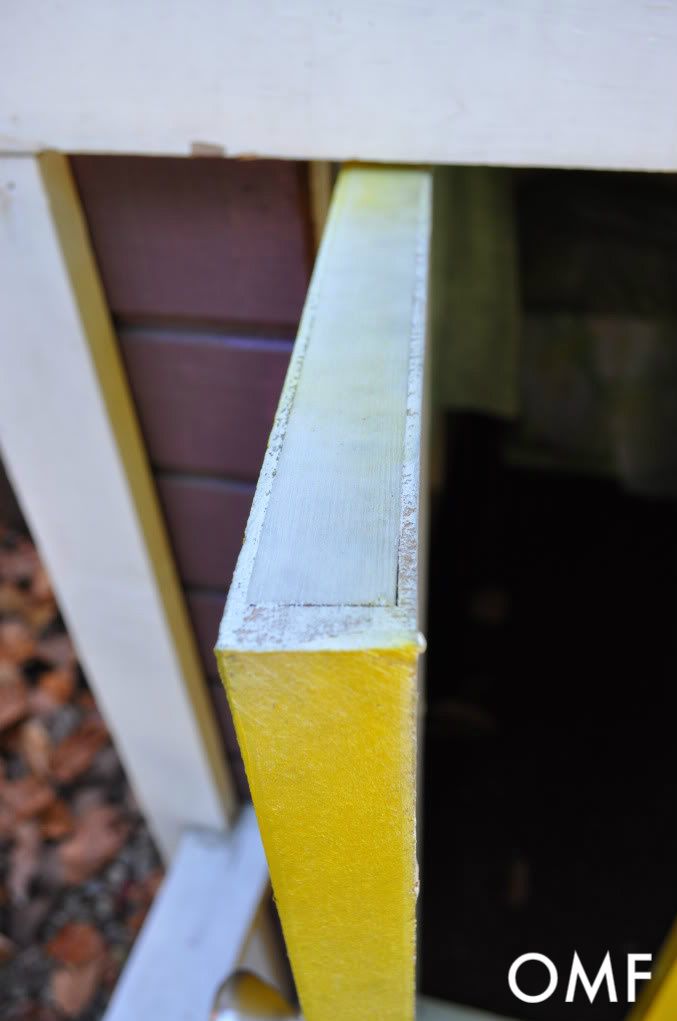
He hinged them so they open outward and then we put on some inexpensive door knobs. Of course, I wanted YELLOW doors! I had leftover spray paint from another project that I used.
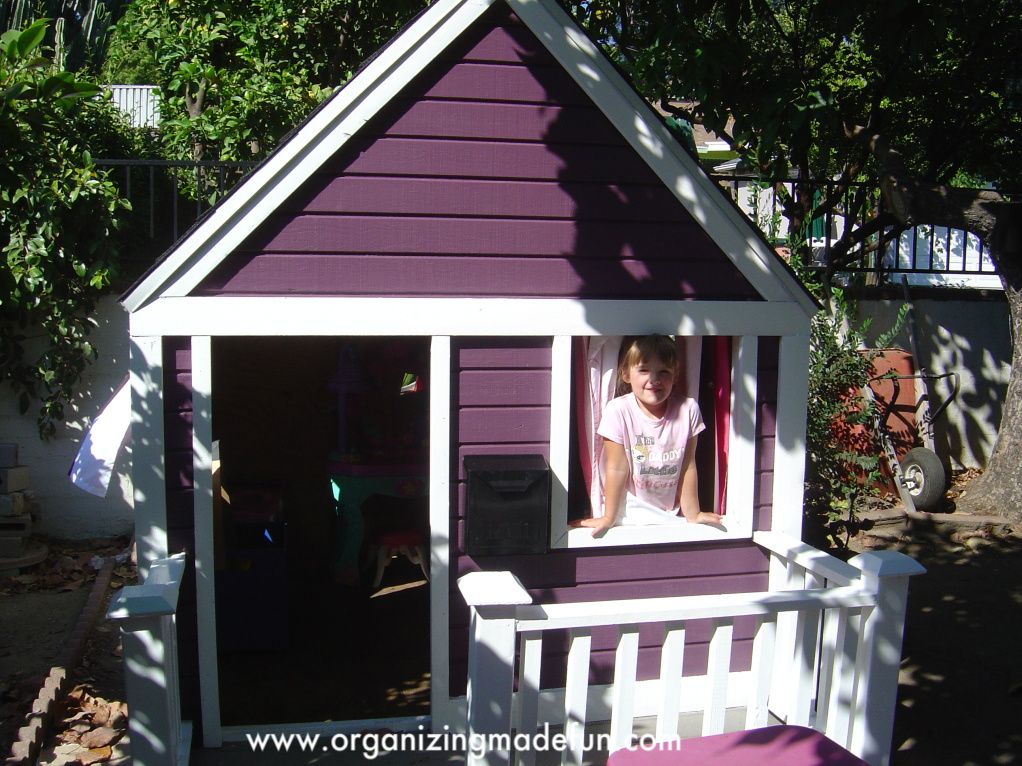
Here is the playhouse - now complete with the doors and the added shutters and looking as cute as can be!
Aren't they just fun? All the little girls are having the best time in there! I would've loved this when I was her age!
Like what you see here? Consider becoming a follower or subscribe via email!
Parties:
Tater Tots and Jello
Funky Junk Interiors
Positively Splendid
Iheart Naptime
DIY Showoff
A Bowl Full of Lemons
Delightful Order
Labels:
backyard,
Kids,
paint,
projects,
spray paint
Friday, November 11, 2011
Lamp re-do
I am back at you, bringing you some projects from around our house {since we've been gone so long for the 31 day series}! Back in September, I shared with you a delightful project that I did for my daughter's room which was her pretty nightstands that I re-painted a cheerful yellow and I put butterfly decals on it!
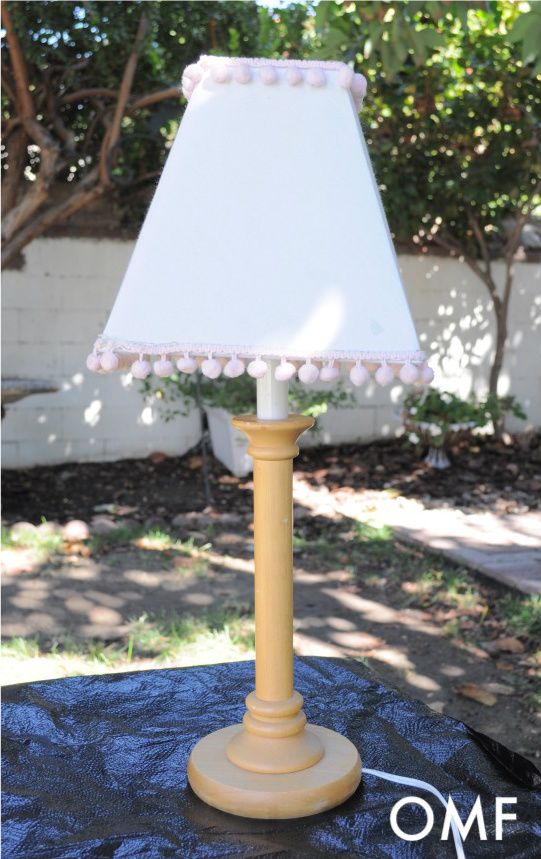
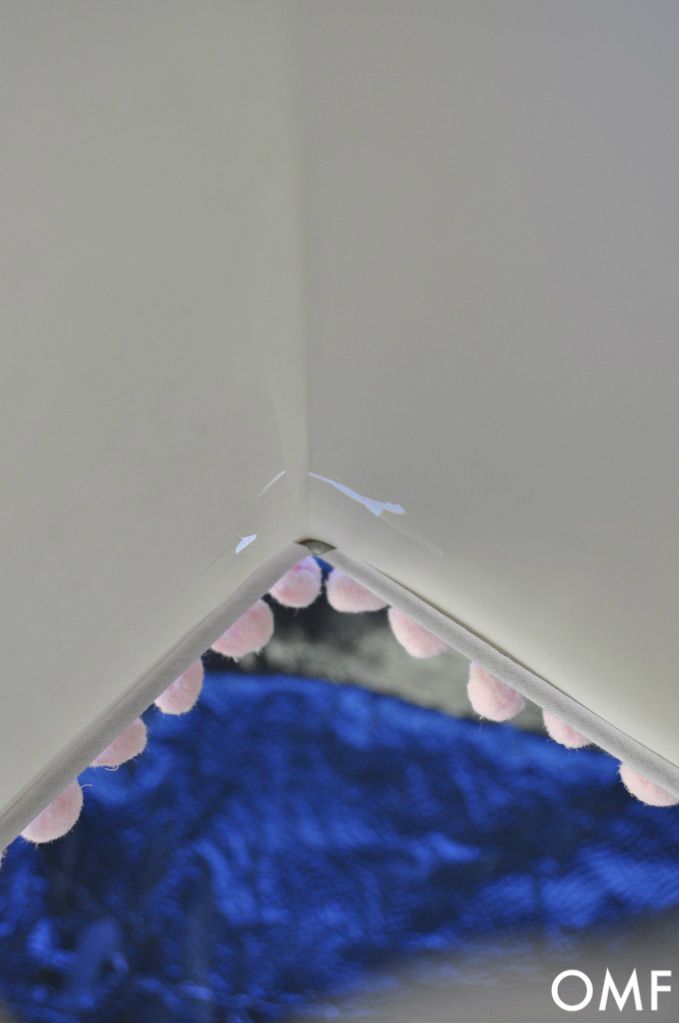
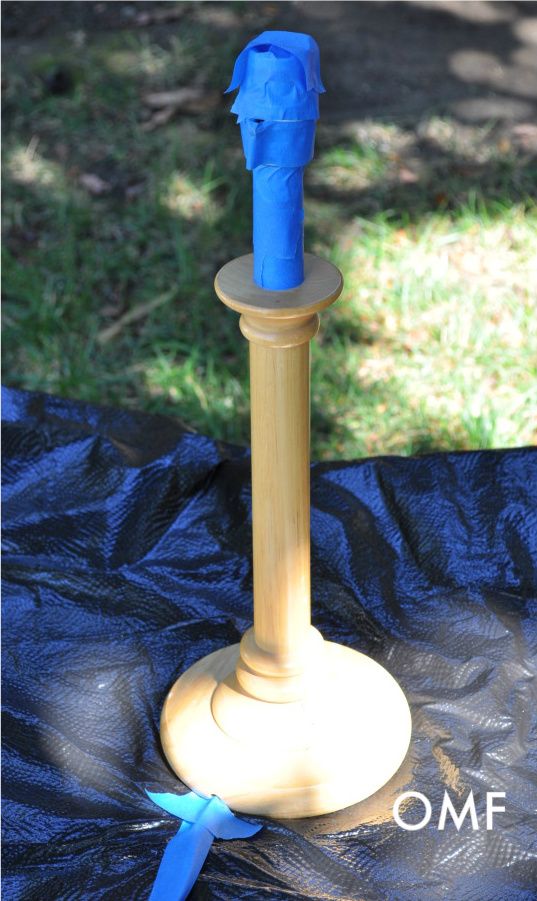
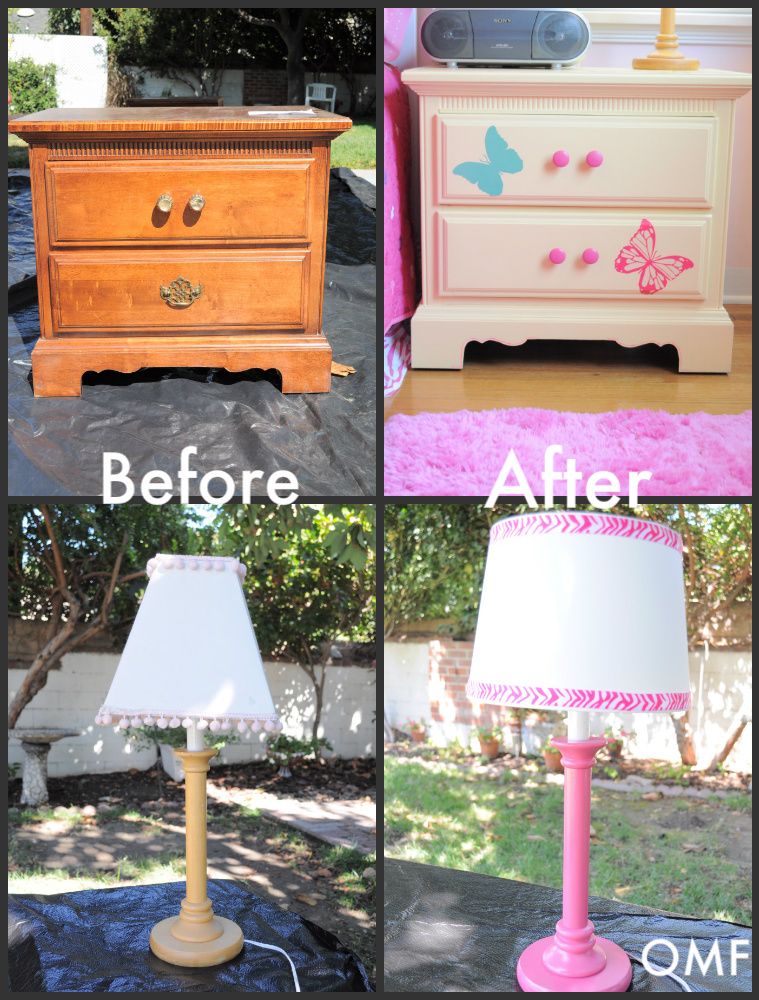
Well, the make-over didn't really end there! She has these lamps in her room, which we originally used in our old house family room.They have been through a lot and were showing their age. I tried sprucing them up a few years ago with some cute ball-rick-rack around the edges. But, it just wasn't holding up!
As you can see, the shades were plastic on the insides and it were cracking and starting to look pretty awful. It was like this throughout the shade. So, I bought new lamp shades and decided to change up the rest of it.
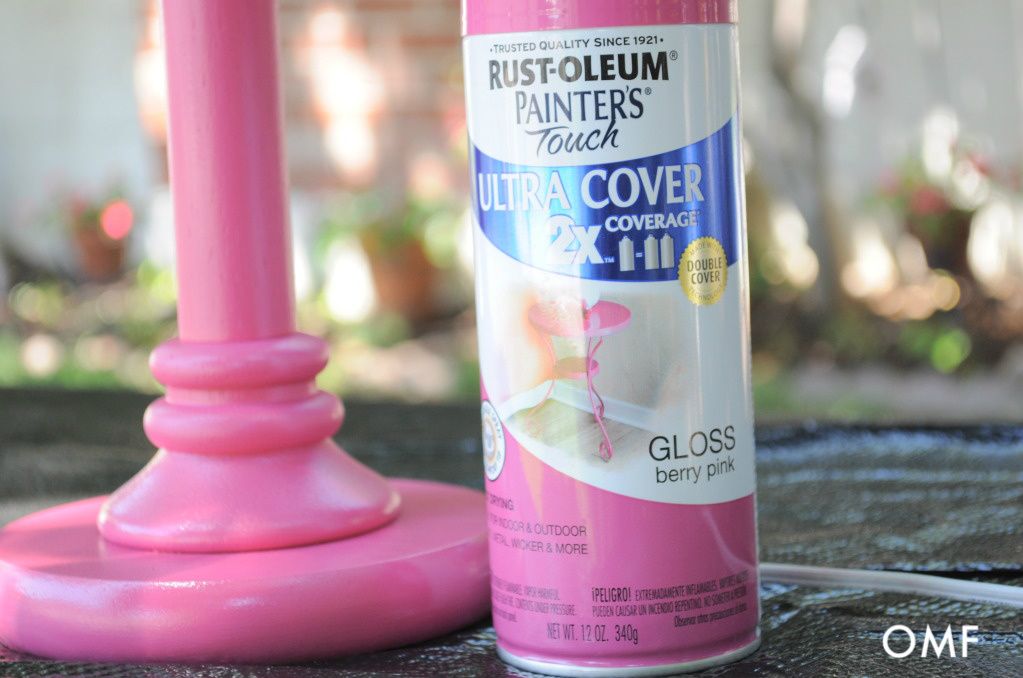
So...spray paint to the rescue! I used this very berry pink spray paint {same one as on the nightstand knobs}!
It's just so fun! Spray paint is coming in some fun colors now, too. Have you noticed?
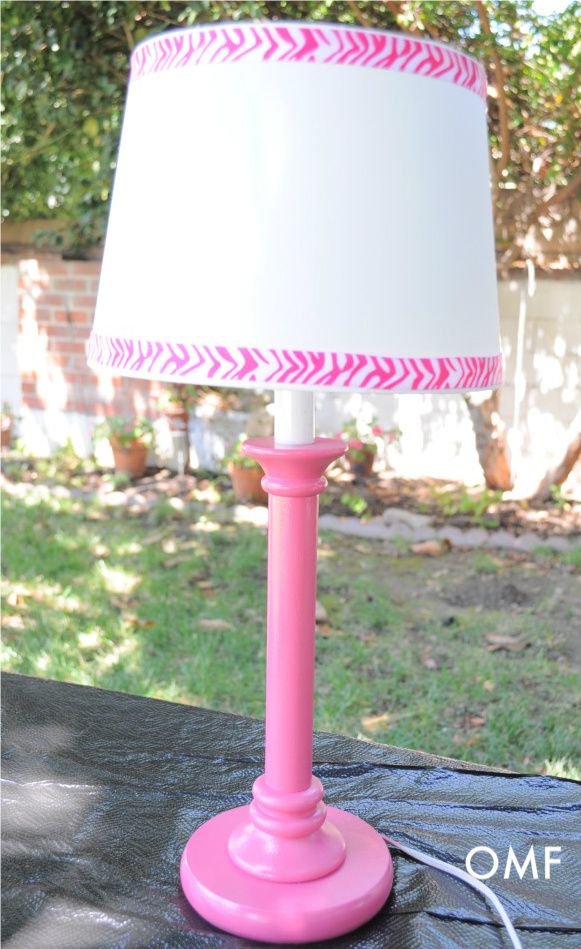
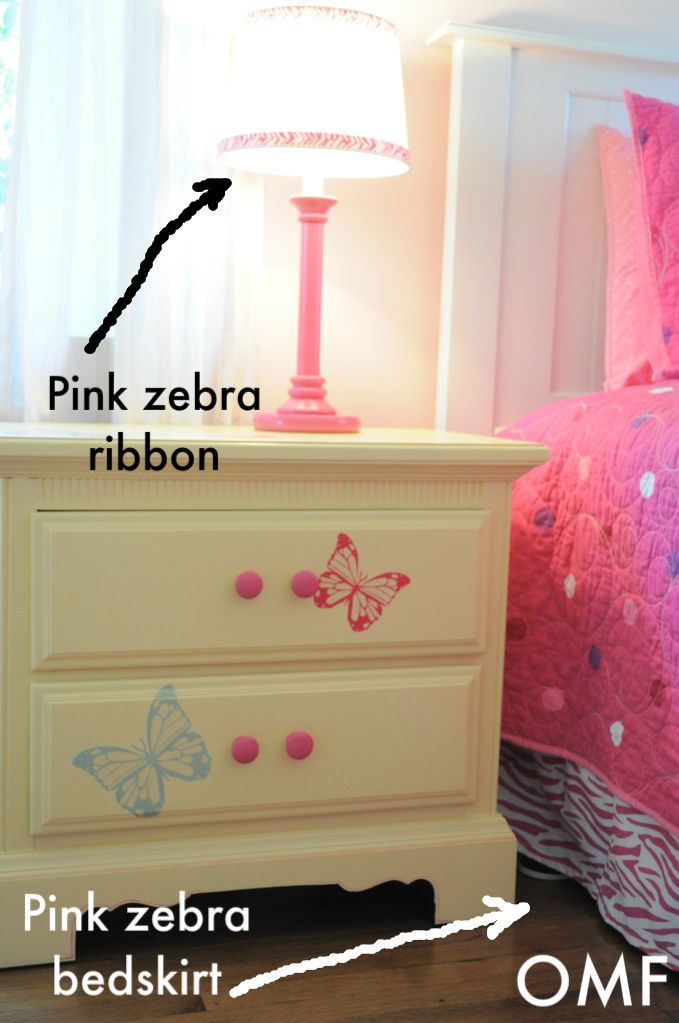
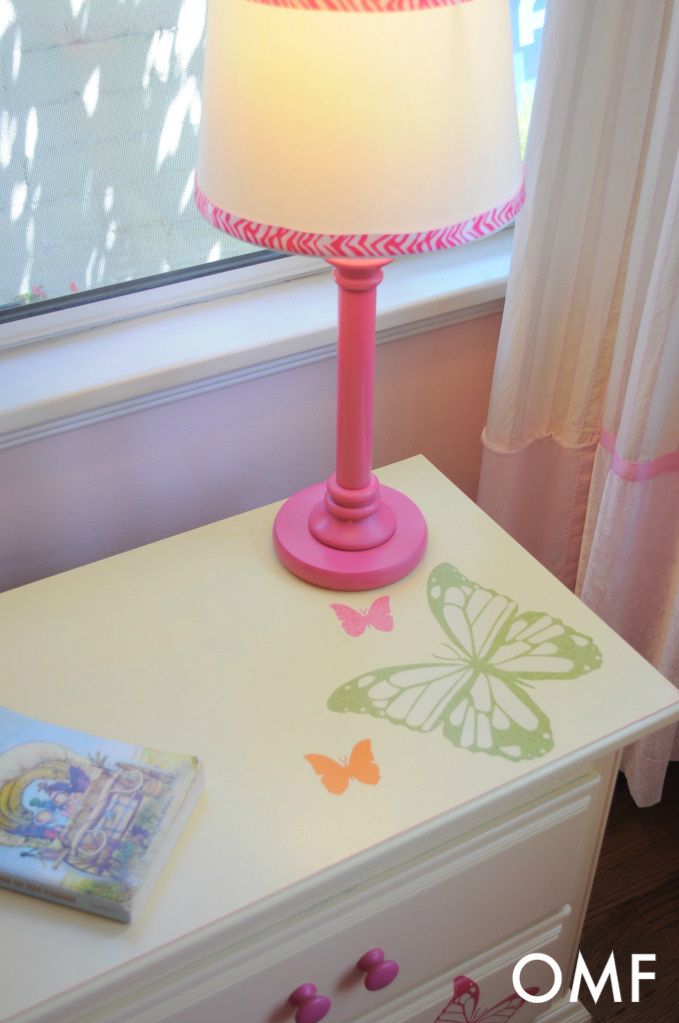
Well, this is how it turned out! I also added some fun pink zebra ribbon - which matches her pink zebra bed-skirt - around the top of the new shades. I picked up the shades at Target!
I added them to the already super-cute nightstands to just make everything THAT much cuter!
So girlie, aren't they? We're sort of in the transition stage of her not wanting the soft pink colors, but Mom won't re-do the entire room since we just did it a few years ago!
I got her this bedspread and hot pink stuff to sort of pacify her until she gets to her pre-teen stage, which will undoubtedly cause her to change her style again - sounds like me! I kept the paint, curtains, and everything else! I love re-doing her room, a little bit, so this is why I won't pay very much for doing her room, either.
Yes, she's got some cute stuff going on in there now! What do you do about kids growing from stage to stage and decorating their rooms? Any good ideas?
It's just so fun! Spray paint is coming in some fun colors now, too. Have you noticed?
Well, this is how it turned out! I also added some fun pink zebra ribbon - which matches her pink zebra bed-skirt - around the top of the new shades. I picked up the shades at Target!
I added them to the already super-cute nightstands to just make everything THAT much cuter!
So girlie, aren't they? We're sort of in the transition stage of her not wanting the soft pink colors, but Mom won't re-do the entire room since we just did it a few years ago!
I got her this bedspread and hot pink stuff to sort of pacify her until she gets to her pre-teen stage, which will undoubtedly cause her to change her style again - sounds like me! I kept the paint, curtains, and everything else! I love re-doing her room, a little bit, so this is why I won't pay very much for doing her room, either.
Yes, she's got some cute stuff going on in there now! What do you do about kids growing from stage to stage and decorating their rooms? Any good ideas?
Like what you see here? Consider becoming a follower or subscribe via email!
Parties:Remodelaholic
Tater Tots and Jello
Funky Junk Interiors
Ask Anna
Iheart Naptime
DIY Showoff
Tip Junkie
A Bowl Full of Lemons
Not Just a Housewife
House of Hepworth
The 36th Avenue
Delightful Order
The Shabby Nest
Beneath My Heart
Friday, September 30, 2011
From Shabby to Cutie!
My cute, little girl had these tiny little nightstands I bought many years ago. Well, storing her CDs, cassette tapes {yes, old school tapes}, and her other books next to her bed was a mess. So, I told her we needed to find her a set of nightstands for cheap, but were much bigger.
She has a full sized bed that we use in there, as well, for when company comes to stay. So her room is our "guest room" and would be great to have larger nightstands.
On our vacation this summer to Big Bear {I've told you that mountain town has some GREAT thrift stores} we found a pair of nightstands of pretty solid wood, for $10 each! Pretty ugly, though! Orangey wood color. My plan was to paint them with white semi-gloss I had in the cupboard. But, at the last minute, I just couldn't! So, instead....
Yes, yellow! I was inspired by this little plant container I found for 50 cents at the thrift store. I found some left-over yellow paint from the kids bathroom and painted it yellow!
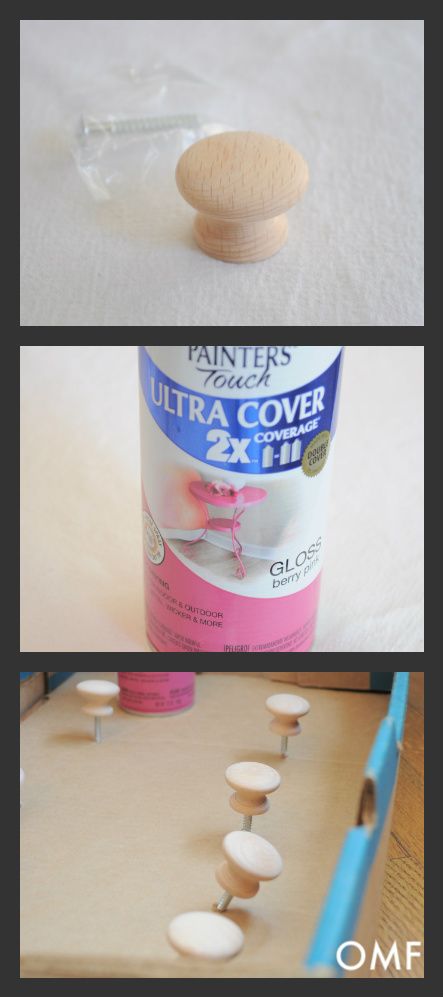
Then, I took these cute wall decals and decided to use them on the piece, too. I wanted to replace the ugly hardware with pretty crystal handles. But, the hole openings on the nightstands were in a weird size and I couldn't find anything that would fit and was cheap! So, I found 8 wood knobs for $.50 each at the hardware store - hey, if I only paid $10 for the nightsand, I'm NOT going to pay more for the hardware! I even picked up a can of "berry pink" colored spray paint!
The result?
And from the front!
Yes, yellow! I was inspired by this little plant container I found for 50 cents at the thrift store. I found some left-over yellow paint from the kids bathroom and painted it yellow!
Then, I took these cute wall decals and decided to use them on the piece, too. I wanted to replace the ugly hardware with pretty crystal handles. But, the hole openings on the nightstands were in a weird size and I couldn't find anything that would fit and was cheap! So, I found 8 wood knobs for $.50 each at the hardware store - hey, if I only paid $10 for the nightsand, I'm NOT going to pay more for the hardware! I even picked up a can of "berry pink" colored spray paint!
The result?
And from the front!
And I cleared coated it to protect the decals...
Last, here is a before and after!
She loved it! And it totally matches her personality! What do you think?
Like what you see here? Consider becoming a follower or subscribe via email!
Parties:Serenity Now
Remodelaholic
Tater Tots and Jello
Funky Junk Interiors
Iheart Naptime
DIY Showoff
Ask Anna
Thrifty Decor Chick
A Bowl Full of Lemons
Tip Junkie
Not Just a Housewife
Organize and Decorate Everything
Domestically Speaking
House of Hepworths
Perfectly Imperfect
Tidy Mom
Miss Mustard Seed
The Shabby Nest
Funky Junk Interiors
Iheart Organizing
Subscribe to:
Posts (Atom)